

This “How To Make Salmon Leather” is an updated method which I am experimenting with, and so far everything says so far it is an improvement on my original method.
First things first I want to say thank you to Laurie and Pascale at Resto Bistro Pêcherie Manicouagan for agreeing to give me their Salmon skins. Laurie does a great job making sure the skins are in good shape and freezing them right away on removal which is important to prevent any degradation.
I had originally asked at IGA in Baie-Comeau as they had previously supplied me with skins. But apparently the store is under new management and when asked the manager said no, no reason given. I was willing to pay for them and was not asking for anything free. I guess this new manager would rather throw them in the trash instead of have them put to use.
Sad, really.
What You Need For This How To Make Salmon Leather
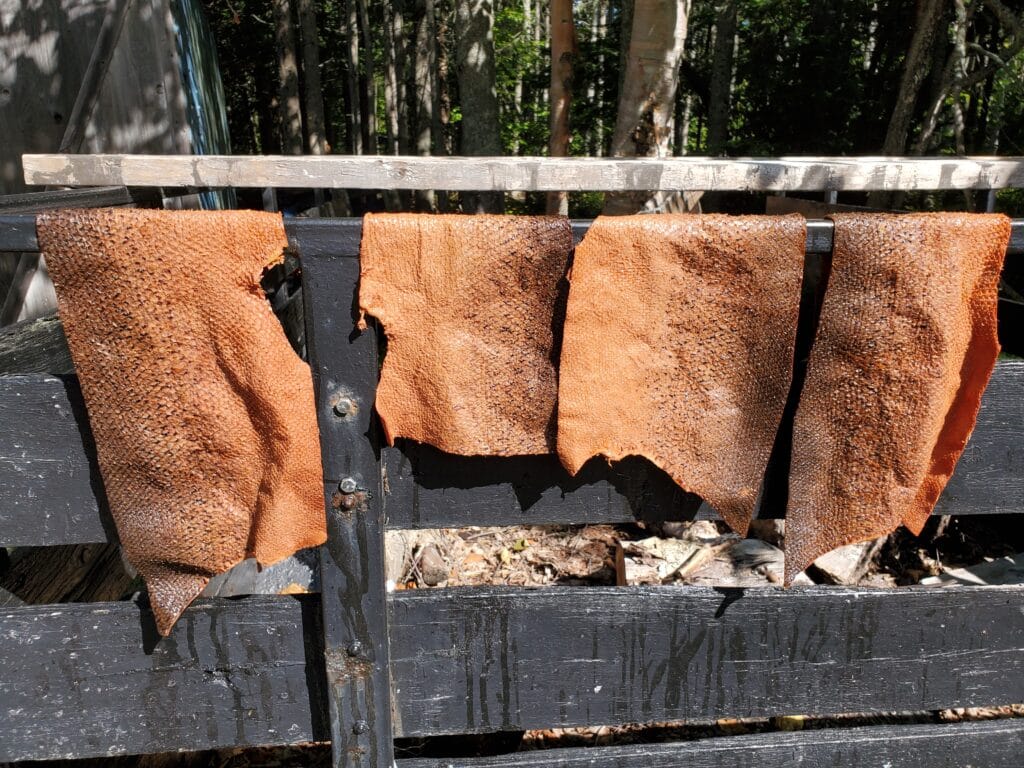
- Salmon skins free from cuts, or deep abrasions. I use four in this guide.
- A source of tannins, I use either inner birch bark or willow bark / powder. In this guide I use birch
- Four clean 5 gallon buckets
- Hydrated lime, also known as slaked like or builders lime. This is “
calcium hydroxide (Ca(OH)₂)“.
- White vinegar
- A butterknife with dulled teeth
- Clean cold water softer is better than harder, hard water can leave deposits and cause spotting
- A table and a piece of 2×8 or close to for working the skin on
- An oil to replenish the skins after tanning. I always use birch tar combined with either coconut oil or jojoba oil. Birch tar is a critical component for my style of Salmon leather but not required. It is a rare oil which is hard to make, I do usually have some for sale here if you would like some.
- Rubber gloves
- Large stainless steel pot (must be stainless as tannins will react with other types of steel)
- Something to read temperature (optional)
The tanning process takes 10-12 days and it is extremely important that your skins are kept below 20C from the time you start working them until you take them out of their final tanning tea. If they get above 20C it is quite possible you endup with weak leather and possibly delamination of the skin.
NOTE: I will not share every detail on how to make salmon leather in the way of Russia leather, there are certain things such as ratios and amount of time which take a lot of trial and error. These things do make a difference on the final product. I am providing you a solid base to begin from, you should play around and see what works best for you. To the best of my knowledge I am the only person making salmon leather in this way.
The Benefits Of “Russia Leather” Style Salmon Leather
Russia leather was renowned for its smell, wear resistance, durability, resistance to water, saltwater, mold, fungus, bacteria, insects, and even rodents. Some of these traits come from the process used to create it and some come from the use of birch tar during the oiling stage. I have spent years digging up information on Russia Leather and trying different ways of making salmon leather in the same way as Russia leather was made. This article is the culmination of that time and effort. The result has turned out to be a very tough, wear resistant salmon leather which inherits the traits of Russia leather that I listed above.
Creating The Bark Tanning Tea
I collect the inner bark from white birch that I harvest in the spring for the years firewood. Spring when the trees are budding and the water is running full blast in them is the best time as the bark is easy to remove. First remove the outer bark, than remove the inner bark. I use a small falling wedge to help peel it off the trunk.
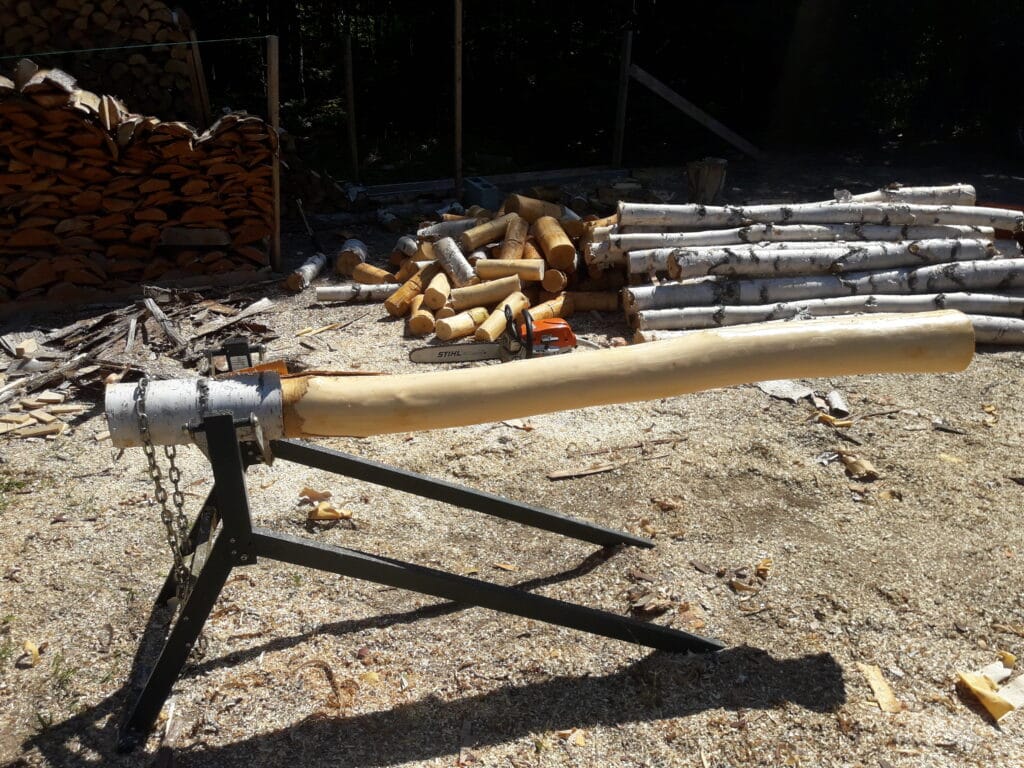 Once off you need to dry it, I do this by putting it out on a tarp in the sun and the wind. Make sure it does not get wet, if it gets rained on it is ruined as the tannins are water soluble. Once it is fully dry you need to break it into small pieces, I put chunks into a five gallon pail and bust them up with a sledge hammer.
Now place the hulk smashed bark and water into the stainless pot. Now the important bit here, to get the most out of your bark you want to use about a 10:1 ratio (water:bark). The reason why we do this is because water becomes tannin saturated at around 10%-20%. If you were to just fill the pot with bark and add water you would be leaving probably 30% to 50% of the tannins in the bark. I wasted A LOT of bark and tannins before I figured this out!
60C to 80C is optimal for tannin extraction, higher than that and you start to degrade them. I leave my tea on the heat for two hours, stirring it every 15 minutes or so. You should make at least 3-4 liters of tanning tea. Once you have it store it sealed in a cool dark place.
Preparing Salmon Skins For Bark Tanning
Prepare Your Lime Bath
Soon as you are done fleshing and descaling each skin you will want to get them in the lime bath. Soaking salmon skins in a hydrated lime (calcium hydroxide) solution, is a key step in preparing the skins for tanning. It creates a highly alkaline environment (pH 12-13) that swells the skin’s collagen fibers, loosens residual flesh, scales, or membranes, and breaks down proteins and fats. This deep cleaning enhances the skin’s ability to absorb tannins during tanning.
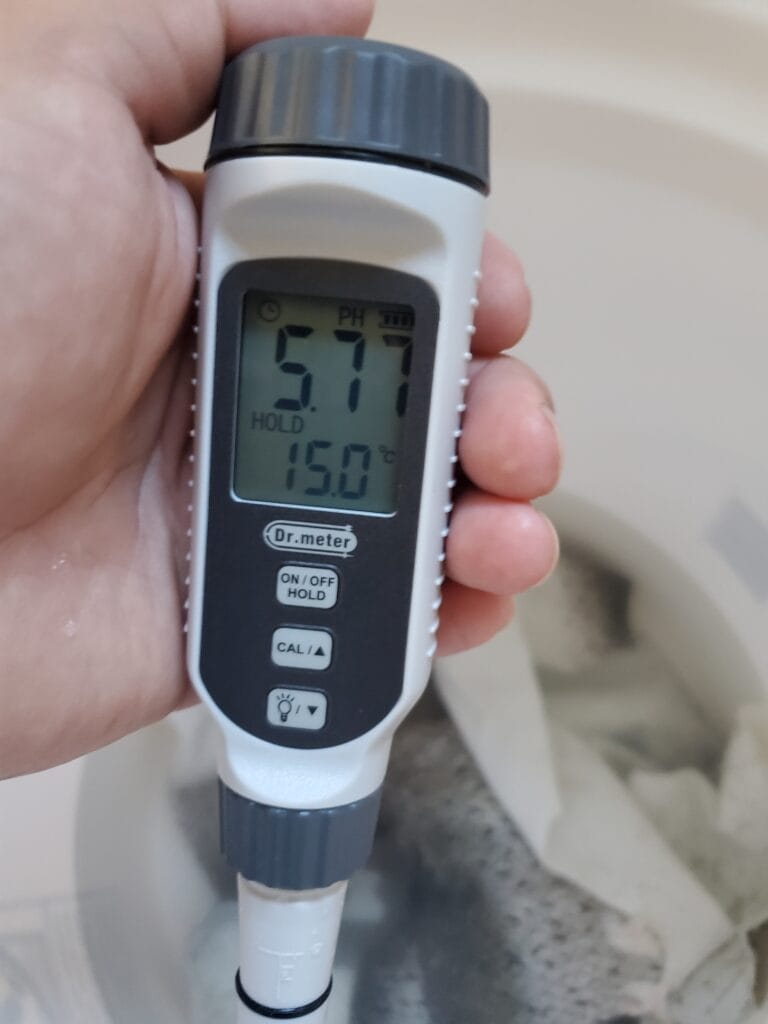
Here is a PH reading from one of the lime baths:
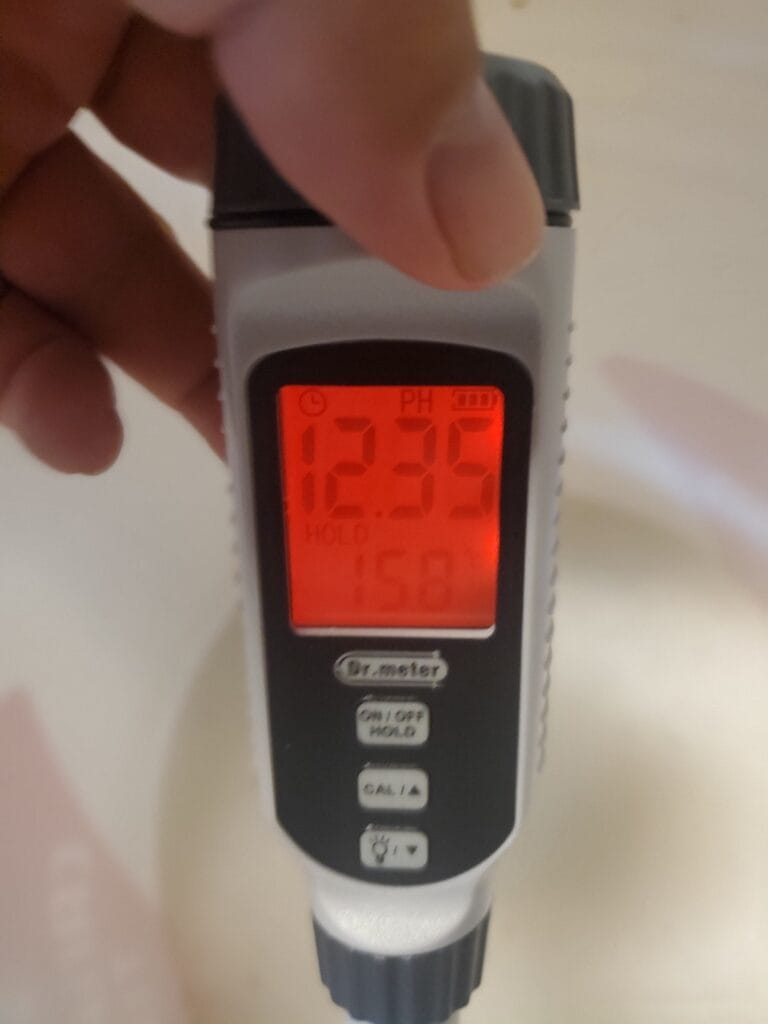
For a ratio around 15 tablespoons per 5L of water seems to work well. In 5L I usually put 5-6 skins.
Scraping and Descaling Your Salmon Skins
Unthaw the skins and get the first one on the table, remeber keep them under 20C. If where you are working is above 20C you can keep a bucket of clean cold water nearby and dip the skin in it when you feel it may be getting to warm.
I flesh the skin first as I find the scales come off easier this way. If you have a thick layer of meat you can use your butterknife and work it in between the skin and meat, push and cut it should somewhat peel off, after that you can scrape. When you are scraping you will find a grey membrane, you will remove most of it, some of it will not come off that is fine. Pay special attention to the edges and the belly area as there will be some hard and thick parts to scrape.
The scales you need to go against them, take your time, you don’t want to get too aggressive and stretch out the pattern. Once all scales are removed the skin should go directly into the lime bath. I soak the skins in the lime bath for about 12 hours, always keeping the water under 20C and agitating every few hours. It is fine for them to sit overnight without agitating.
Rinse and Vinegar Bath
Now it is time to give the skins a good rinse with clean cold water to remove the lime. Next you will put them in a bath of vinegar and water to bring the PH back to 5.5-6. I use 75ml of vinegar to 5L of water which works well, two hours in the bath is enough. When you first add the vinegar the baths PH will likely be around 3.5, this will come up after adding the skins:
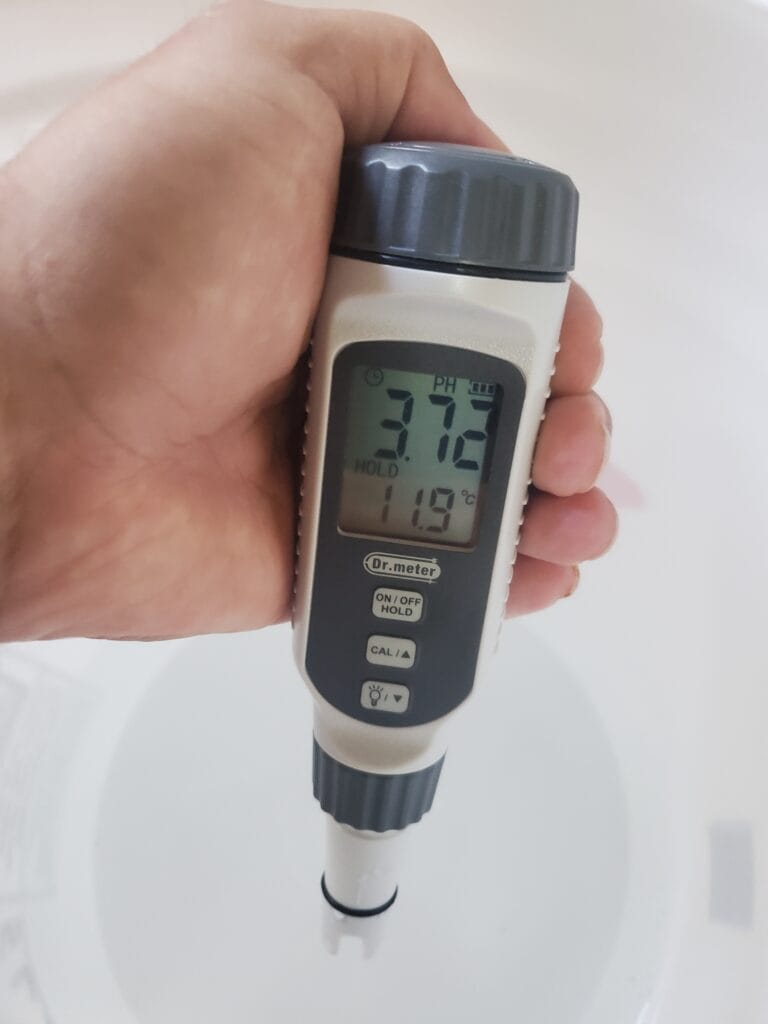
After 1 hour of soaking in the vinegar bath:
After 2 hours in the vinegar bath the skins were ready, so they were rinsed thoroughly in cold clean water and tanning started.
Tanning The Salmon Skins
It is important to start the skins off in a weak tanning tea, I start them in 10:1 tea (water:tea). Prepare this, then remove the skins from their vinegar bath, rinse them, and put them in the tanning tea. It is important to move them around in the tea every 10-15 minutes during the first hour, this give s them a “good start” and ensures the first shot of tannins is evenly absorbed.
There is no hard and fast rule on how long to tan them or how much to increase strength of the tanning tea as you go, you learn to “read the tea” and the skins. I’ll give you an example using the batch I did for this article I used 5 litres of tea until the end where I went up to 6.
- Day 01: Tea at 10:1 ratio
- Day 02: Remove 800ml add 800ml full strength
- Day 03: No change as I saw there was still enough tannins in the tea
- Day 04: Remove 500ml add 50mml
- Day 05: Remove 500ml and add 500ml in the morning. I saw the tannins were absorbed very quickly and did another 500ml swap in the late afternoon
- Day 06: Remove 1 litre and add a litre
- Day 07: Remove a liter and add a liter
- Day 08: Skins go into full strength tea, 5 lires at this point was not enough as the skins had thickened substantially, 6 litres was needed.
- Day 11: Tanning is complete. No additional tea was needed from day 08 to day 11.
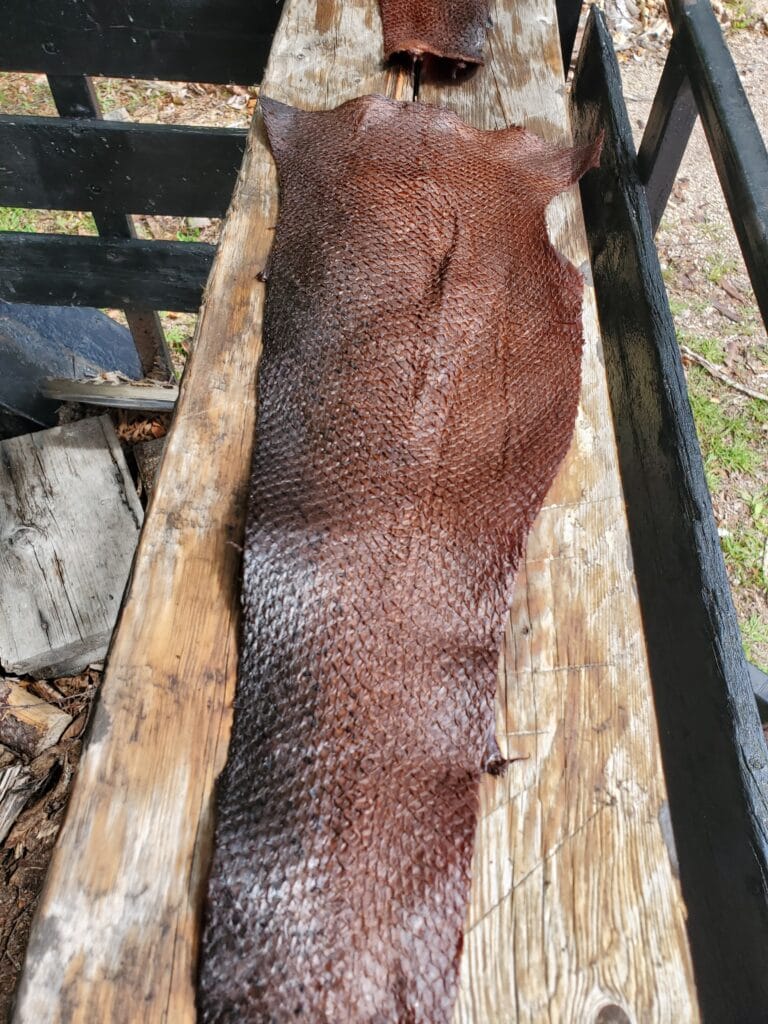
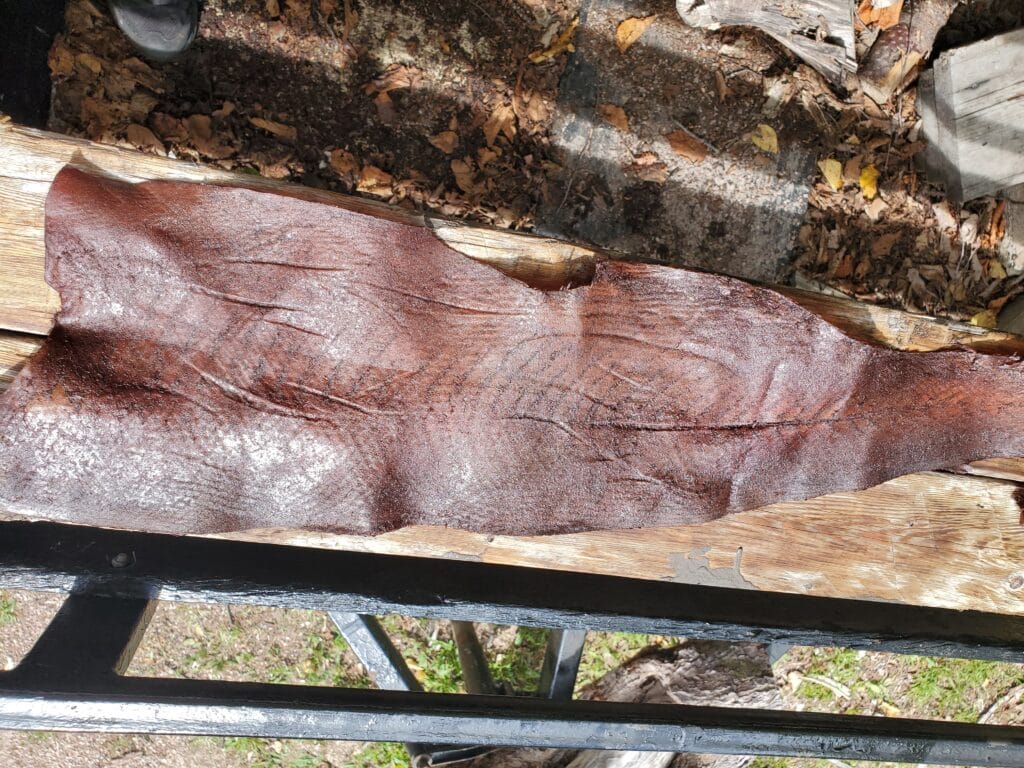
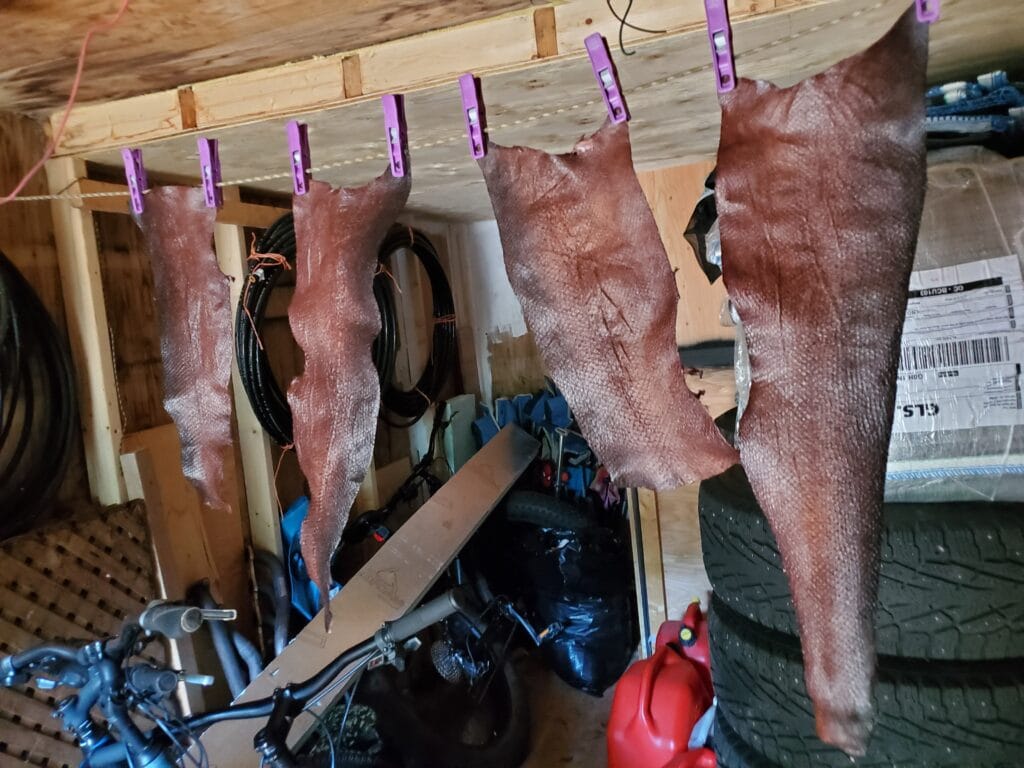
Drying, Oiling, and Working The Salmon Leather
I hang my skins to start the drying process, they dry until damp to the touch.
Once damp to the touch I work each skin once. To “work” them I stretch the skin side to side working my way from top to bottom. I then pull the skin back and forth over the top bar of the trailer, I put a lot of downward force when pulling the skin back and forth over the bar (flesh side down). I then slighltly stretch the horizontally and at an angle to relax it back to a neutral position taking out wrinkles.
Now I oil the skins with 50/50 mix of stabilized birch tar and jojoba oil. Both the scale side and flesh side get oiled. I wait ten minutes and work them again. I repeat this process until the leather is dry, I usually re-oil it lightly during this process which takes 30-45 minutes. When I am not working them they lie flat on some wood.
Once dry I hang them for 2-3 weeks to air dry inside a storage container. The birch tar oil gives off a very strong smoky phenolic smell and it needs time to mellow. This is the “smell of Russia leather”. The smell persists for many months, sometimes up to a year but is mellow after the weeks of airdrying.
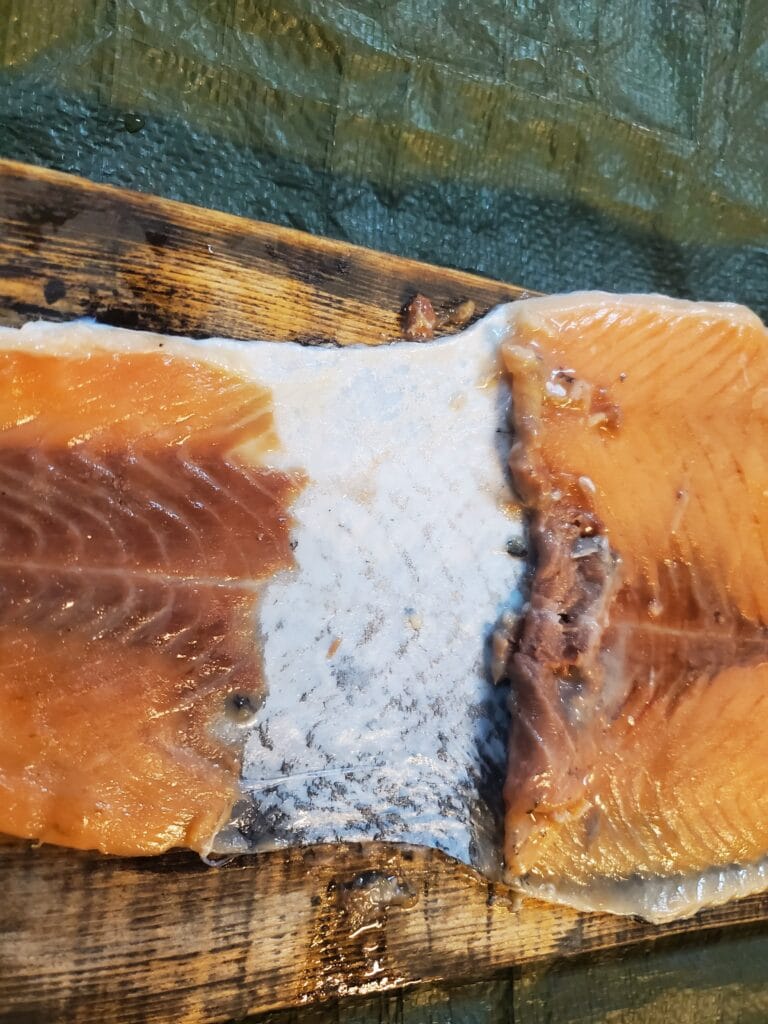
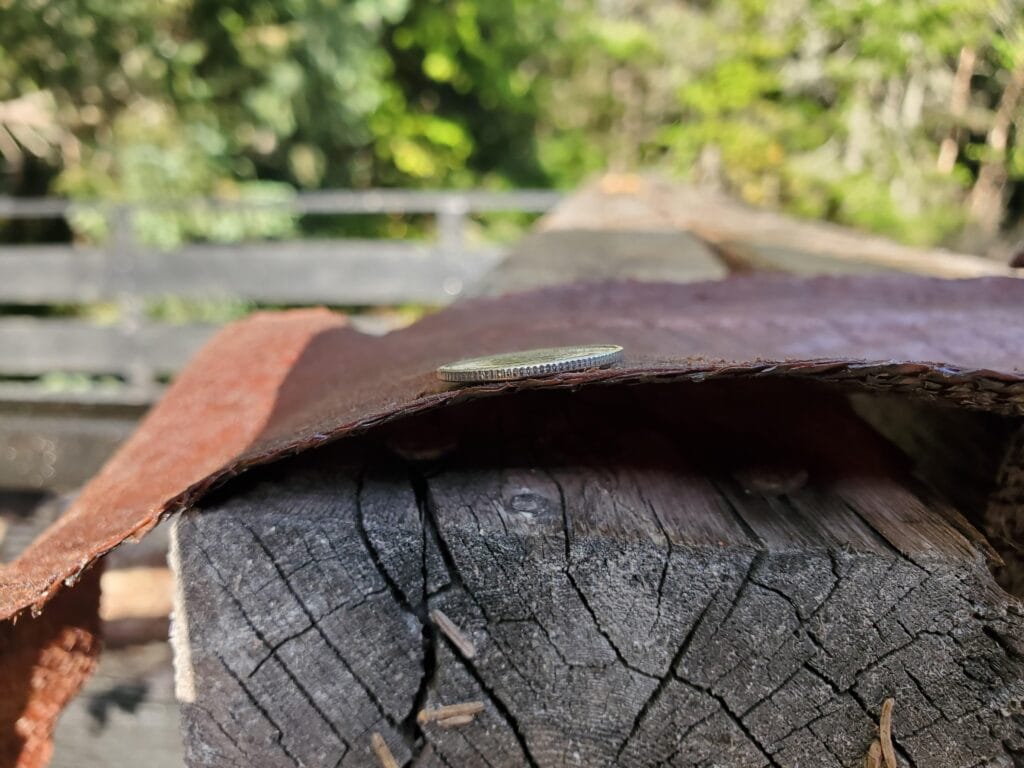
Salmon Leather Thickness
I get asked quite often how thick is salmon leather. It is around 1mm thick and depends if farmed or wild, wild salmon have a bit thicker skin. Here you can see in comparison to a Canadian dime whish is 1.2mm thick:
Quality Checking The Salmon Leather
Well bark tanned salmon leather should be very tough and durable with a tensile strength of around 8x that of regular leather, it should also shed water readily. Try and tear the leather, you should not be able to. If it tears something went wrong. Usually this means a dead tan AKA case hardening or delamination of the skin.
A dead tan is when at the start of the tanning process the tea is too strong and it tans the outside of the skin preventing tannins from penetrating into the skin. If this happens you may be able to see it if you cut the skin, you will not have even color. The inside will be a lightish color and the outside the color of your bark tan and or oils.
Delamination when I have run into was caused by the temperature going over 20C at some point in the tanning process and the skin degrading.
There should be no “fish smell to the leather, if there is, it is likely something has went wrong.
If everything checks out, congratulations you know how to make salmon leather and should have some unique, tough, durable, and beautiful leather!